
Do you often find that you need to upload files or supporting documents with application forms? Have you found an easy way to manage your files and documents allowing access to only those who need to access them?
Here is how to manage your document uploads through infoodle with a few simple steps.
Upload to the Library
The Library in infoodle is the area where all the documents, digital files and item lists are stored.
Like most libraries, it is set up by catalogues, collections, folders, documents and list items.
You will first need to configure where you want the uploaded files to be stored. Eg. A job application; This will be in the HR Catalogue, Job application collection, in the specific job folder.
When configuring the Library you will need to give permission to the individuals or groups who are allowed to access and view files and who can edit files.
Upload to a contact profile page
You are able to store both individual and organisation/household files on the contact profile pages. You can create several folders, these will be global folders – on each contact page, but the files uploaded are unique to that contact. You will need to create the folders first.
Create the form
Create the form adding the headings, information and fields that need to be completed. Eg. Name and contact numbers etc. and any other information needed. There are a variety of fields that can be selected; free text fields, added as notes to the contacts profile, select from dropdown menu, date, tickbox, integer etc.
Then add the File Upload field.
You are able to choose how many files can be submitted.
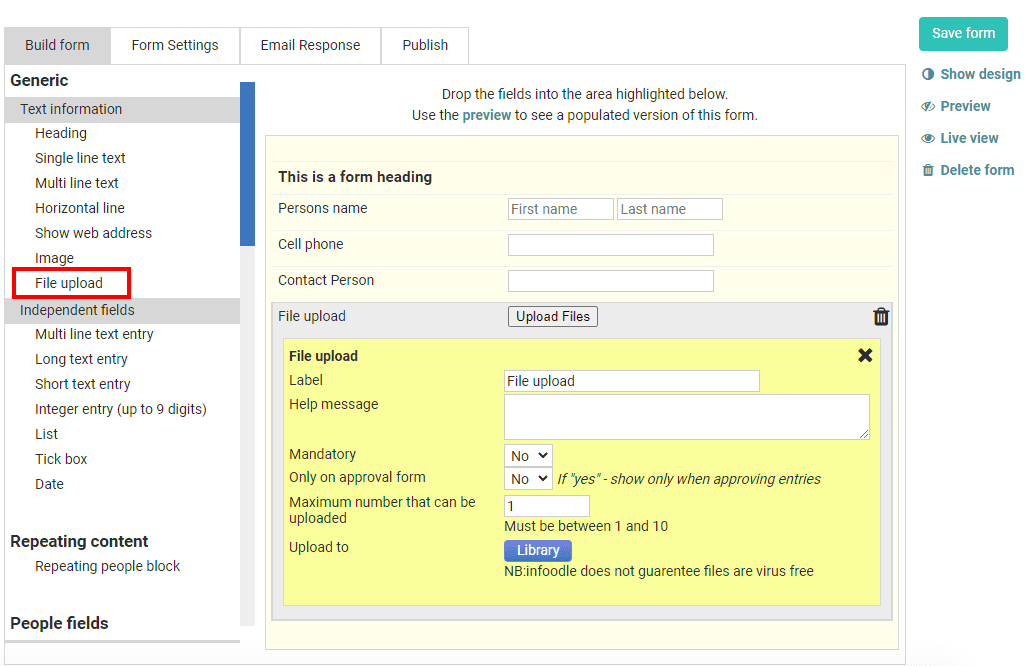
The blue ‘Library’ button will allow you to choose the location the file will be uploaded to.
Complete and publish the form as a link in your website or as a link in an email.
Now you can process the forms, the attachments will be uploaded to the correct file when processed.
For more information, contact sales@infoodle.com.